Thursday, October 21, 2010

My Shabby Textured Harvest Decor

I think I found the last 3 white pumpkins available in the entire State of Maine.  And I am so in love with them.  I love this one because of it's texture. 


I paired my pumpkins with a ceramic pheasant and then captured a shot of them through the shabby mercury surface of one of my vintage mirrors.   


Gosh, I really love all that added texture that the mirrored image gives.   


Here's a closer look at the actual pumpkin in the foreground, compared with it's more textured reflection in the mirror. 


Then I remembered I had brought in the last of my cilantro the other day and left it on the counter of my downstairs kitchen. 


I am lucky to have 2 kitchens where we live and this one is not the one I cook in everyday, so I decided to just make it part of my harvest decor too. 


So why not harvest the seeds to use as a spice. 


So far I have no idea what recipe I could use these cilantro seeds in though. 


But I really like the color and texture, as well as the fragrance that has managed to envelop the entire space.  So there you have it, the extent of my harvest decor so far. 


Oh and Simon says hello to everyone too. 


I think he has probably taken notice of that pheasant in the downstairs kitchen. 

Wednesday, October 20, 2010

The Way Out

Starting out on this sunny 57 degree day I was fine, but after the first couple of miles my hands were cold and the wind was making me shiver. 


But oh the scenery just kept getting better and better. 


In addition to letting me drive, Henri brought chocolate.


 He also found some gloves for me to wear, pulled up my hood and let me have the last piece of chocolate.


Yes, yes this IS fun and I like it very much!  He just forgot to tell me I had chocolate on my lip. 


We ended up riding 36 exhilarating miles on this glorious autumn day in Maine breathing in the smell of the pine scented woods and fading autumn leaves as the trail led us through a tranquil wilderness bog surrounded by wildlife and the calm serenity of a windswept open field. 


Nearly back to where we started out we came upon Jasmine and her master just starting off on their journey. 

 
I do believe I even saw her wink at me as if to say "I always have fun here too."

Monday, October 18, 2010

Blueberry Barrens of Deblois Maine

Scenery while driving along Route 193 in Deblois today.


A close up of a row of tiny blue camps used to house migrant workers during blueberry season. 


This location is owned by the Jasper Wyman & Son Company, the largest U.S. grower, packer and marketer of blueberries. 


Henri pulled over to the side of the road several times for me today. 


One of our favorite autumn rides.  


For when an autumn Nor'easter comes through and blows almost all the pretty leaves right off the trees.  That's when we head for the place where we know the color is still wildly brilliant. 

Thursday, October 14, 2010

A Study In Color

Fall colors I've captured this week from a few of our favorite places here in Maine.   The crimson of the blueberry barrens in Franklin, not far from Sorrento.


 Lily Bay Road overlooking Moosehead Lake up in Greenville.    


Seemingly taken in the wilderness, yet just 1 mile from the hubbub of downtown Dexter.


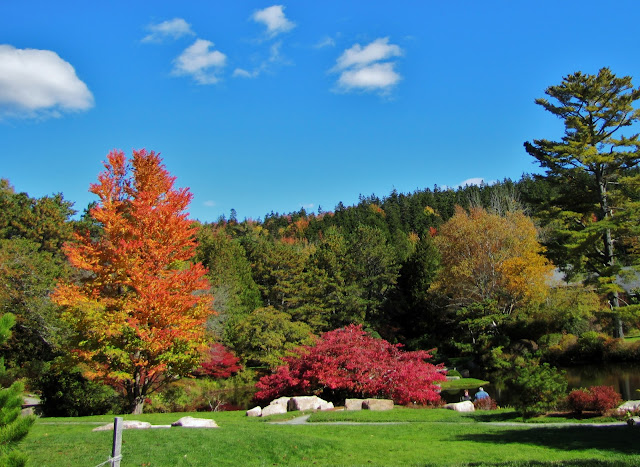
Asticou Azaela Garden in Northeast Harbor on Mount Desert Island. 


From Great Head Trail in Acadia National Park overlooking Sand Beach and the Beehive. 


My first painting from an art class I started today in Ellsworth.  


Ok that was painful, but necessary, so I will be sure to show you my progression attempt to paint something that won't make me wince when I look at it.  The class I am taking is Adult Finger Painting, taught by my friend Helen Douglas.  If you are local and want to join in the fun you can contact Helen at (207) 664-9559.  Take a look here to see some of Helen's amazing finger paintings. 

Sunday, October 10, 2010

Acting Artsy

On Saturday we attended an artist's reception at the Gallery Grand in Ellsworth. 


Here are a couple shots of downtown Ellsworth looking out from the gallery. 


The reception was for our dear friend Helen Douglas, a sampling of whose work I have shown below. 


Guess who Helen invited to join her in this rotating artists' gallery until mid-November?


  I can't even begin to tell you how honored, flattered and excited we are to have this opportunity to join Helen.   So come on inside and have a look around! 


Remember the driftwood tree I showed you in my last post?  It was for in here.   


I took these pictures throughout the week as we were getting everything set up.  


What a fun week we had getting everything all ready to open. 


It's just feels so good in here with all this glorious color. 


We're still pinching ourselves to have been given this opportunity.


And simply savoring every minute of it too! 


Friday, October 1, 2010

Making A Driftwood Tree


Driftwood is plentiful around here, especially the day after we've had high winds and rough seas. Here is my finished version of what I came up after I decided to gather a collection of some of the smaller pieces I found. 


The shore always seems to lend me inspiration on the days when I most crave it.   


Whether rounded, thin, broad or gnarly, any collection of driftwood will work. 


And probably any container will work too, but I selected what I had on hand -- one of our raku pots. 


Because the tree will tend to get a little top heavy, to weight the base I used a tree stump that would fit into the pot and drilled a 1/4" hole in the center to insert the dowel that will help provide stability.   To help cover up the stump and to fill in all the gaps around the perimeter, I added this soft green moss that I plucked from where it grows on the branches of some of the old dead pine trees here on the coast. 


After I had a nice layer of moss built up on the base, I just started drilling 1/2" holes in the center of all of the pieces of driftwood.  Then I  began layering them up by slipping them down over the dowel in crisscross fashion beginning with the longer pieces, continuing to taper them shorter in length as the tree began to take shape.  For the very top piece, I drilled a smaller 1/4" hole to have it fit a bit more snug, that will serve to hold it all in place. 


And that's all there was to it, very simple really, but actually it took me a while to figure it all out. 


I enjoyed this project so much, that I've already made plans to make a much larger one.   Also, I admit I'm not the best at tutorials, but if you want to make one too and you have any questions, please just let me know!  Plus, I don't let you know nearly enough, but I really do appreciate and love reading all of your comments, and I thank you for each and every one of them you have ever left for me.